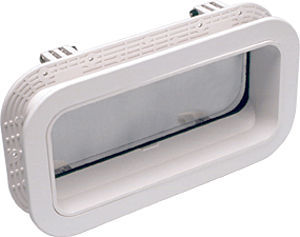
The portlight on the Starboard side was looking a little “worse for wear”
The portlight was ugly, the trim ring was cracked, the bug screen was broken, the lens was cloudy and the outer silicon seal was falling out, so….
It was time to replace it.
It looked like the outside edges had been sealed with silicon at some point and that was failing.
The outside trim ring was brittle and came off in several pieces.


I ran a knife blade around the edges of the portlight and with very little pressure it literally fell out (or actually in, crashing into the sink in the head)
Next I cleaned up the outside surface and sanded down the high spots.
Although there was no sign of it on the inside, I discovered that the portlight had been leaking.
The inner wall is teak plywood and the outer is fiberglass but in between is 1/2″ plywood and the lower aft corner was WET! Luckily it was just the inner core of the plywood that was wet and damaged.
Good thing this project is getting done!


I dug out the wet wood with a small screwdriver and used the shop vac to help clean out the debris. Then I dried out the cavity with a hair dryer and let it sit open for a day or so.


After it was completely dry, I sanded the entire opening. I mixed a small batch of epoxy resin and applied it with a brush around the opening and using a syringe I filled the cavity, level to the bottom edge of the opening.
I let this cure for a couple of days.
Next, I dry fit the new portlight in position to measure the fit and the outside edge.

The new portlights come with a full 2″ depth spigot. The old one was flush mounted to the trim ring.
I think that the flush mounting actually caused the seal to fail and leak, so I opted to extend the spigot out 3/8″.
The spigot was easy to trim using a table saw. (sorry no pictures of that step)
The old portlight was mounted with the trim ring screwed on from the outside.
I like the look of the trim ring without the screws so I chose to use 4200 to attach it.
I opted for the BECKSON Self Drain Port. I think it looks better than the “rain drain” style with the two cut outs on the bottom.
Next, I installed the trimmed portlight. The inner flange is screwed to the cabin wall from the inside.
Then I taped around the outer edge outside of where the trim ring will sit to make it easier and neater to clean up the excess 4200.
I then sealed the gap between the spigot’s outside flange and the cabin side and the old screw holes with 4200.
I applied a generous bead of 4200 around and under the trim ring and gently clamped it in place.
After a short set up time I removed the clamps and tape and cleaned up any excess 4200.

I re-taped the trim ring to keep a bit of pressure on it and left it to set up overnight.
………..and here is how the Finished Port Light looks
Another needed project done !
On to the next one…………………………..


